博客历史
语言迭代
php-java-java-nodejs
程序迭代
wp-oneblog-halo-hexo
累了,短时间不准备动了,不过都整理成md了,后续迁移应该还好。halo导出(20250815)没有时间和title,累死了。希望后续有插件更新支持。
背景
之前接触过hexo,不过不怎么用git action,就没选用。最近用多了,还是给博客进行一次迭代吧,刚好也可以用下git。
搜了一大圈教程,很多都是hexo转halo,而我反而是和大多数人背道而驰的。
hexo是静态博客,有很多插件可以使用,主要是最近用claude code,想着能改代码能生成文件,直接本地产生了就推送博客,挺好玩。
基于hexo开源框架搭建博客,然后直接在github page平台上托管我们的博客,就只剩下用心写好内容这一步了。
浏览一圈:Hexo, 产品成熟,使用简单,功能强大,有丰富的各种插件资源;但,像发布后台、站内搜索,评论系统类似诉求,虽然有对应的工具,但也需要折腾,慢慢完善吧。
初体验
hexo的初级搭建还有部署到github page上,以及个人域名的绑定。
1. 安装Git
2. 安装Node.js
这里我是使用nvm管理安装的。
3. 安装Hexo
前面git和nodejs安装好后,就可以安装hexo了,你可以先创建一个文件夹MyBlog,用来存放自己的博客文件,然后cd到这个文件夹下(或者在这个文件夹下直接右键git bash打开)。
比如我的博客文件都存放在\MyBlog目录下。
在该目录下右键点击Git Bash Here,打开git的控制台窗口,以后我们所有的操作都在git控制台进行,就不用Windows自带的cmd了。
定位到该目录下,安装Hexo。安装完后输入hexo -v验证是否安装成功。
1 | $ npm install -g hexo-cli |
至此hexo就安装完了。
接下来初始化一下hexo,即初始化我们的网站,初始化文件夹
hexo init MyBlog
这个MyBlog可以自己取什么名字都行,然后,接着输入npm install安装必备的组件。
1 | $ hexo init ssbx |
1 | $ cd ssbx //进入这个MyBlog文件夹 |
生成静态网页
1 | $ hexo g |
完成后,指定文件夹MyBlog目录下有: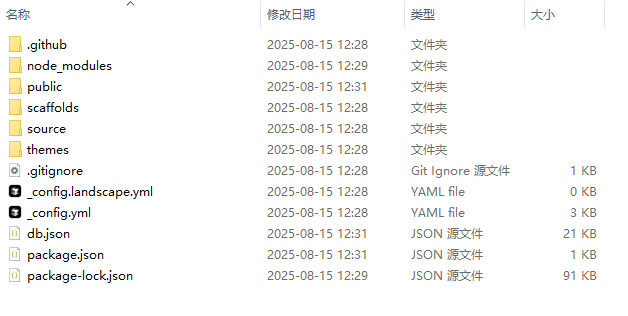
1 | node_modules: 依赖包 |
这样本地的网站配置也弄好啦,然后打开本地服务器,hexo server(或者简写:hexo s))
1 | $ hexo s |
然后浏览器打开http://localhost:4000/,就可以看到我们的博客啦,效果如下: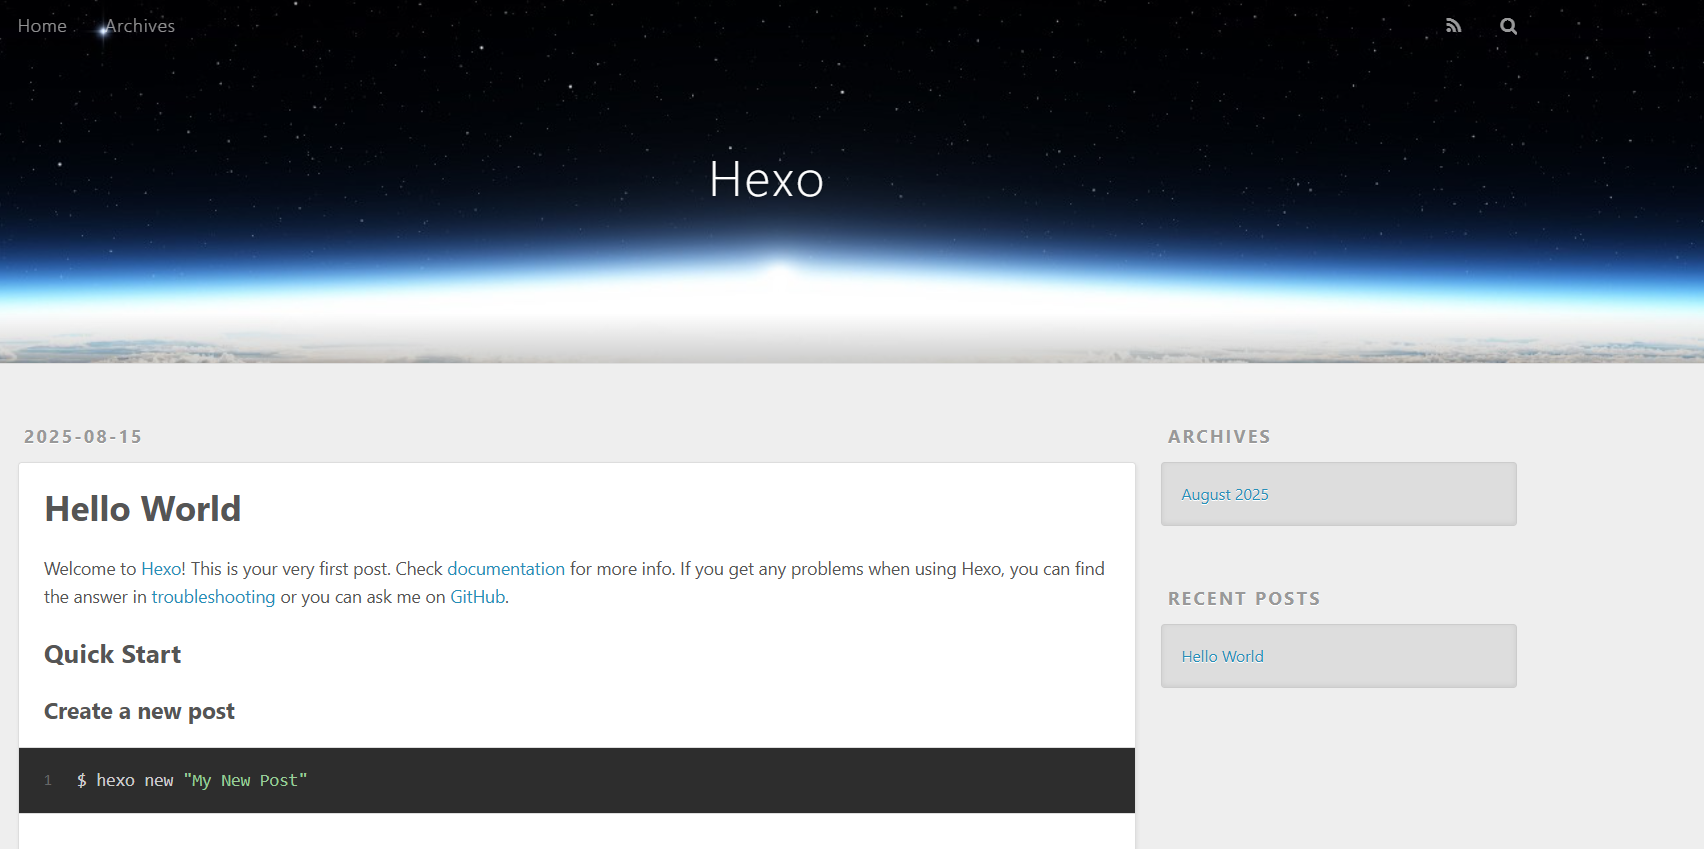
按ctrl+c关闭本地服务器。
4. 注册Github账号创建个人仓库
接下来就去注册一个github账号,用来存放我们的网站。大多数小伙伴应该都有了吧,作为一个合格的程序猿还是要有一个的。
打开https://github.com/,新建一个项目仓库New repository,如下图所示,输入自己的项目名字,后面一定要加.github.io后缀,README文件要开启。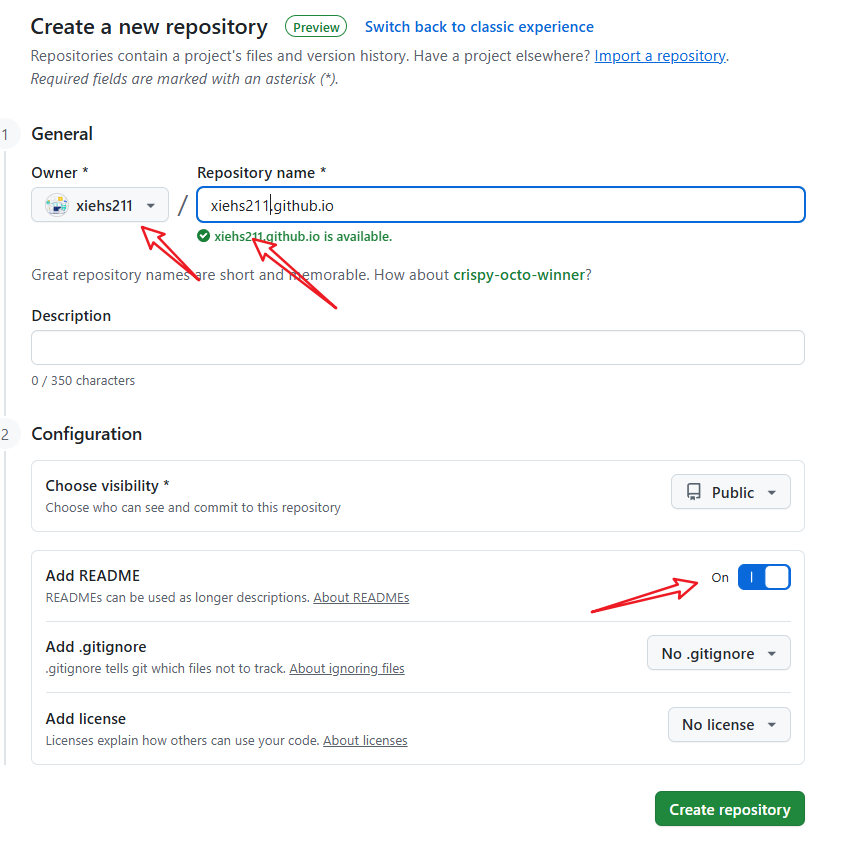
要创建一个和你用户名相同的仓库,后面加.http://github.io,只有这样,将来要部署到GitHub page的时候,才会被识别,也就是http://xxxx.github.io,其中xxx就是你注册GitHub的用户名。例如我的:http://xiehs211.github.io
5. 生成SSH添加到GitHub
生成SSH添加到GitHub,连接Github与本地。
右键打开git bash,然后输入下面命令:
1 | git config --global user.name "yourname" |
这里的yourname输入你的GitHub用户名,youremail输入你GitHub的邮箱。这样GitHub才能知道你是不是对应它的账户。例如我的:
1 | git config --global user.name "xiehs211" |
可以用以下两条,检查一下你有没有输对
1 | git config user.name |
然后创建SSH,一路回车
ssh,简单来讲,就是一个秘钥,其中,id_rsa是你这台电脑的私人秘钥,不能给别人看的,id_rsa.pub是公共秘钥,可以随便给别人看。把这个公钥放在GitHub上,这样当你链接GitHub自己的账户时,它就会根据公钥匹配你的私钥,当能够相互匹配时,才能够顺利的通过git上传你的文件到GitHub上。
ssh-keygen -t rsa -C "youremail"
这个时候它会告诉你已经生成了.ssh的文件夹。在你的电脑中找到这个文件夹。或者git bash中输入
cat ~/.ssh/id_rsa.pub
将输出的内容复制到框中,点击确定保存。
打开github,在头像下面点击settings,再点击SSH and GPG keys,新建一个SSH,名字随便取一个都可以,把你的id_rsa.pub里面的信息复制进去。如图:
在git bash输入ssh -T git@github.com,如果如下图所示,出现你的用户名,那就成功了。
1 | $ ssh -T git@github.com |
6. 将hexo部署到GitHub
这一步,我们就可以将hexo和GitHub关联起来,也就是将hexo生成的文章部署到GitHub上,打开博客根目录下的_config.yml文件,这是博客的配置文件,在这里你可以修改与博客配置相关的各种信息。
修改最后一行的配置:
1 | deploy: |
repository修改为你自己的github项目地址即可,就是部署时,告诉工具,将生成网页通过git方式上传到你对应的链接仓库中。
注:branch很多教程写的是master,github2020认定默认主分支名main,所以我们直接修改为main。
这个时候需要先安装deploy-git ,也就是部署的命令,这样你才能用命令部署到GitHub。
1 | $ npm install hexo-deployer-git --save |
然后hexo clean清除了你之前生成的东西,也可以不加。
1 | $ hexo clean |
hexo generate顾名思义,生成静态文章,可以用 hexo g缩写
1 | $ hexo generate |
hexo deploy部署文章,可以用hexo d缩写
1 | $ hexo deploy |
注意deploy时可能要你输入username和password(可能密码不行,就生成ghp密钥作为密码输入这里)
得到INFO Deploy done: git就说明部署成功了,过一会儿就可以在http://yourname.github.io 这个网站看到你的博客了!!
7. 设置个人域名
直接解析域名的CNAME记录到你的Git二级域名,记录类型选择CNAME进行解析,记录值填的就是username.github.io。
在 hexo 项目下,source 文件夹下面创建 CNAME 文件(没有后缀名的),在里面写上购买的域名。比如:
b.voiceclouds.cn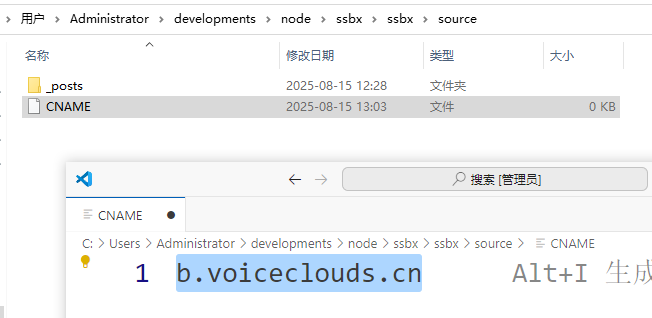
在 github 上面,打开 username.github.io 项目的(Settings)设置,然后在Pages的 Custom domain设置里填上购买的域名。比如: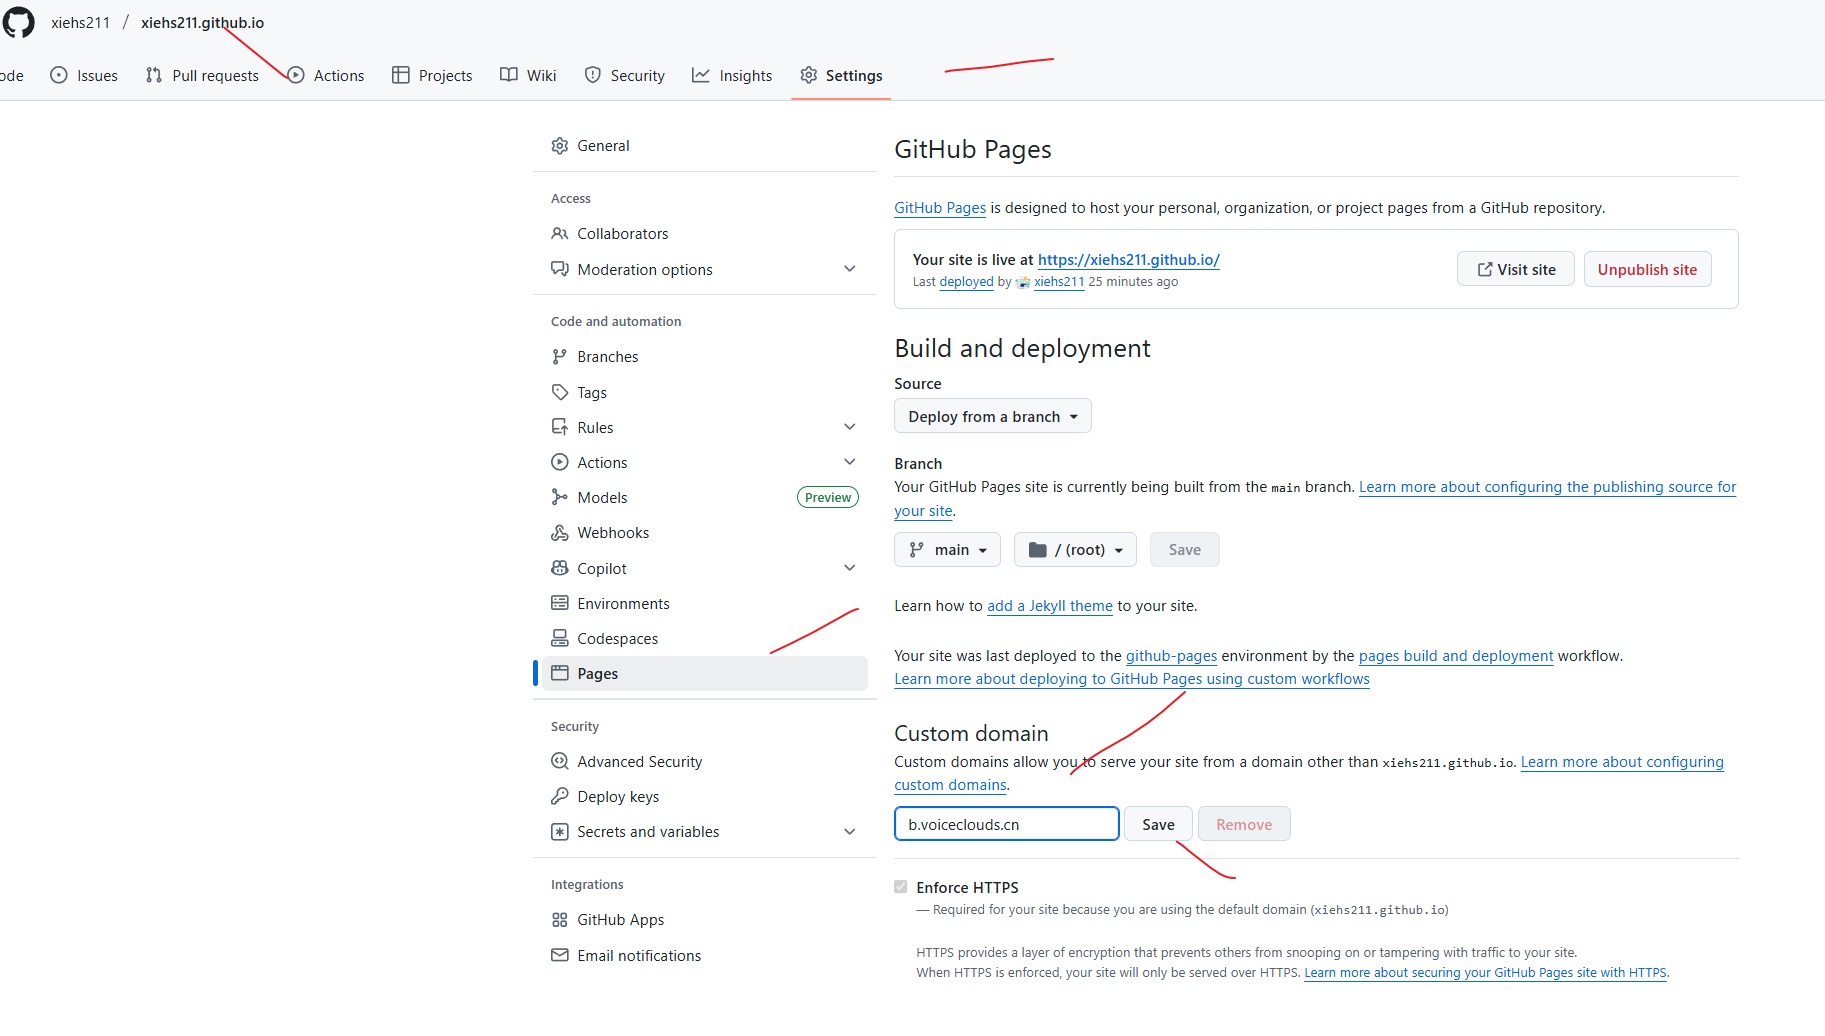
保存,等github配置完成(检查你的解析,自动的),就可以访问了。
8. 安装主题stellar
编辑_config.yml中:theme: stellar 原来是landscape
git bash中继续运行:
1 | $ npm i hexo-theme-stellar |
输入hexo g生成静态网页,然后输入hexo s可以本地预览效果,最后输入hexo d上传到github上。这时打开你的github.io主页就能看到发布的文章啦。
默认主题:
换stellar后: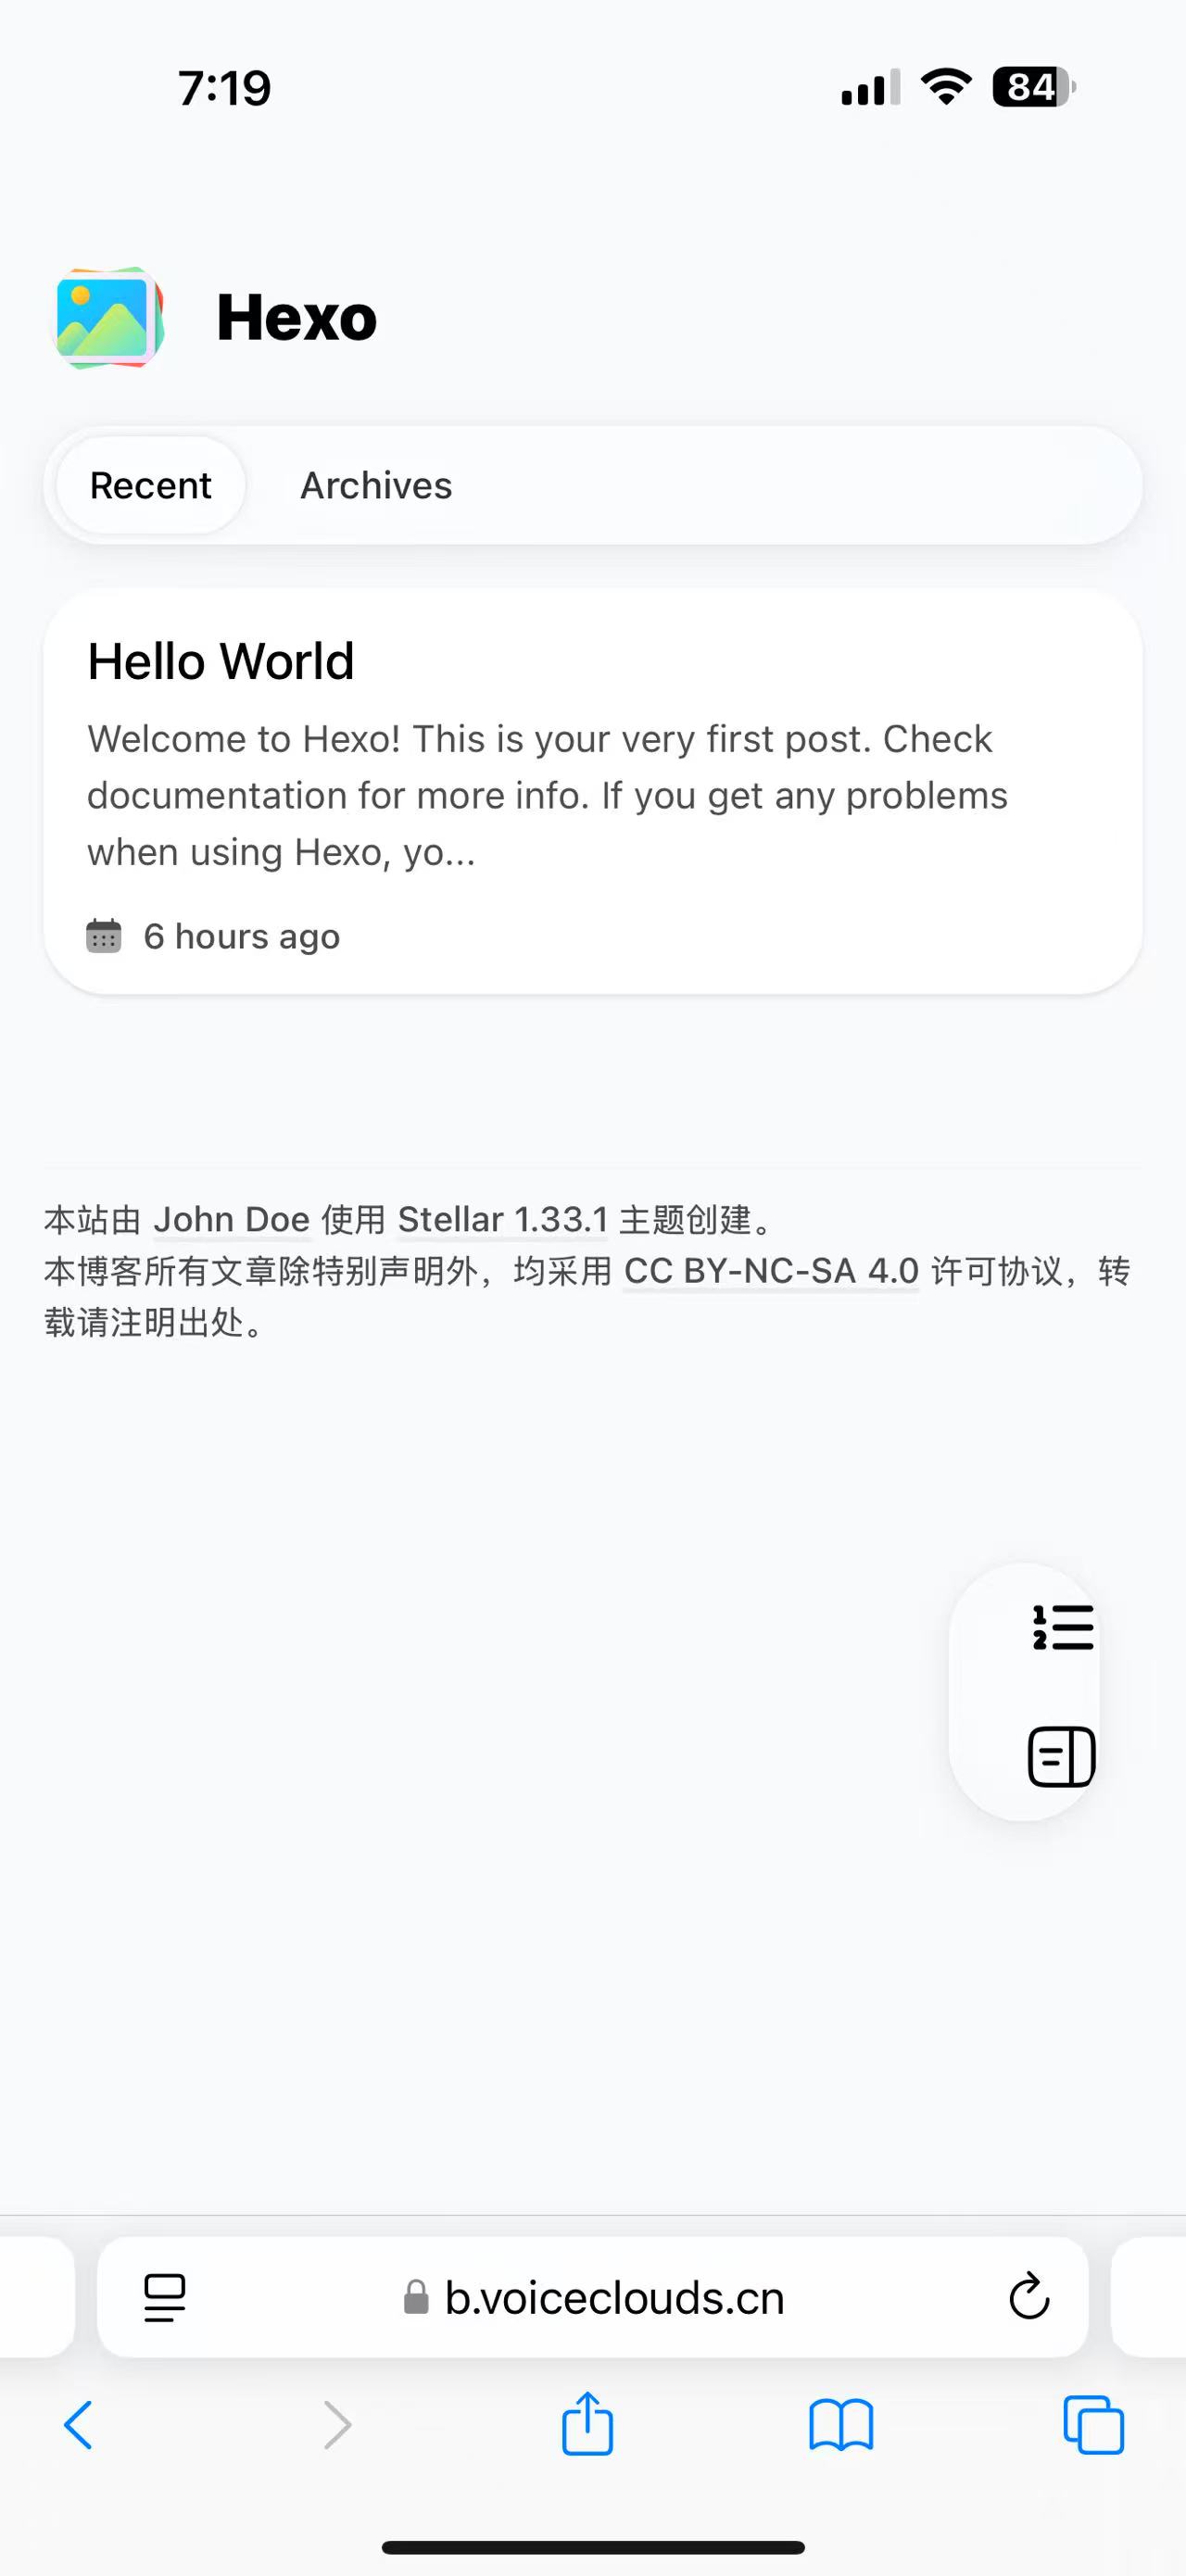
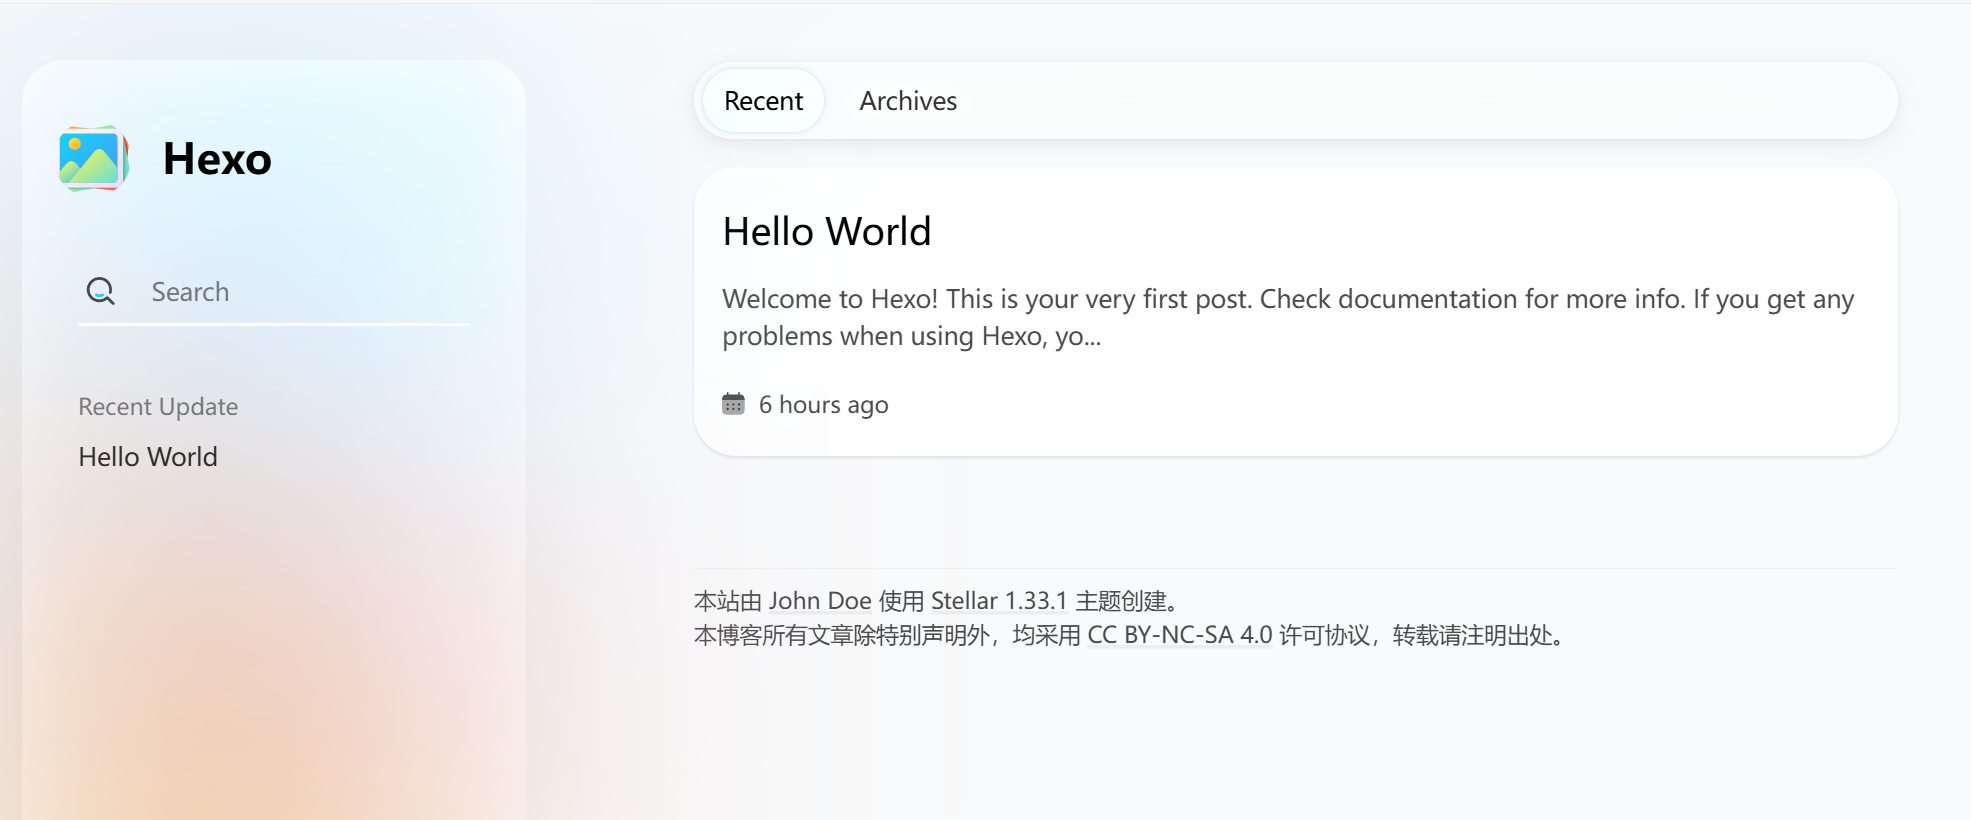
还是好看很多的,主题可以去官网看自己喜欢的更换yml中设置。
8. 写文章、发布文章
首先在博客根目录下右键打开git bash,安装一个扩展
1 | $ npm i hexo-deployer-git |
然后新建一篇文章。
1 | $ hexo new post "第一篇文章" |
然后打开\MyBlog\source_posts的目录,
可以发现下面多了一个文件夹和一个.md文件,一个用来存放你的图片等数据,另一个就是你的文章文件啦。
你可以会直接在vscode里面编写markdown文件,可以实时预览,也可以用用其他编辑md文件的软件的工具编写。
编写完markdown文件后,根目录下输入hexo g生成静态网页,然后输入hexo s可以本地预览效果,最后输入hexo d上传到github上。这时打开你的github.io主页就能看到发布的文章啦。
到这儿就完成了,已经完整搭建起一个比较简陋的个人博客了,后面我们就可以对我们的博客进行个性化定制了。